Fall is here! Yay! That means leggings and sweaters and pumpkin EVERYTHING! It also means decorating your house for the season! This fall wreath is so easy to make and adds a great pop of color to the front of your home.

This post contains affiliate links. For more information please see my disclosures here.
I had all of these leaves![]() left over from a project gone wrong. Instead of throwing them out, I decided to use them to make a wreath for our front door. I never made a wreath before and kinda just went with the flow, but I love how it turned out in the end and it was so easy.
left over from a project gone wrong. Instead of throwing them out, I decided to use them to make a wreath for our front door. I never made a wreath before and kinda just went with the flow, but I love how it turned out in the end and it was so easy.
These are the supplies you will need:
- Wire Wreath Frame

- Floral Wire
- Leaves
- Burlap Garland
- Wood letter
- Paint/Paintbrush
- Hot Glue Gun
Your frame is going to be heavily weighted down by the burlap ribbon so before you start make sure the top of the frame (where you start your leaves) is in a position that won’t lean when you hang it.
Start by arranging the leaves in the order you want them. Once you have that figured out, use the hot glue gun to secure them to the wire frame. Use A LOT of glue! Overlap the leaves so the wire frame and glue does not show from the front. This should take up about 2/3 of your frame.
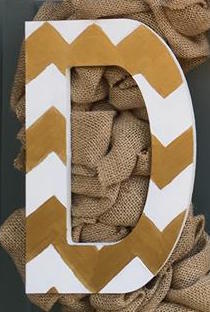
Let the hot glue and leaves settle. While you are waiting, you can paint your wood letter. Use whatever colors and designs you want. I painted my letter white and then painted a chevron design over it in gold.
As you let the paint dry, go back to your wire frame to add the burlap ribbon. Use the floral wire to secure the ribbon at the ends and throughout the frame. Starting where the leaves end, weave the ribbon in and out of the frame, leaving excess puff. You want to start and end the ribbon in the back of the frame so the ends don’t show. Fluff and puff the ribbon until you are happy with the way it looks (but don’t make it too puffy because this is where the letter will go).
When your letter is dry, use the hot glue gun to secure it to the top of the burlap ribbon. Again, use A LOT of glue! I also put books on top of my letter/wreath to weight it down while the glue dried. I left this for a few days but that’s a little excessive. I would give it a few hours or overnight to settle.
And that’s it! You have a beautiful fall wreath! You can use a wreath hanger![]() or, since I didn’t have one, Command Hooks
or, since I didn’t have one, Command Hooks![]() that come right off without peeling the paint when you’re done with them. I also couldn’t use a hanger because I have glass at the top of my front door that would make the hanger stick out instead of laying flat against the door.
that come right off without peeling the paint when you’re done with them. I also couldn’t use a hanger because I have glass at the top of my front door that would make the hanger stick out instead of laying flat against the door.
Now, let’s ignore the ugly green door and admire the fall wreath!


Just beautiful and so creative. Happy to see the leaves went to good use!
Thanks! You know I couldn’t just let the leaves sit there…