Nail art has been popular on Pinterest and Facebook over the years. Naturally, I had to jump on the bandwagon and try it out for myself. It was so easy! And the best thing about it is you can do any design you want.

This post contains affiliate links. For more information please see my disclosures here.
Here is what you’ll need to get started:
- Wood – I used 11″ x 14″
- Paint – any color of your choice
- Paintbrush

- 1″ Nails
- Hammer
- String – 2 colors of your choice
Step 1 – Paint
This part is easy. Just paint the wood whatever color you choose so your nail art has a colorful background. If you like the wood look then you don’t have to do anything!
Step 2 – Design
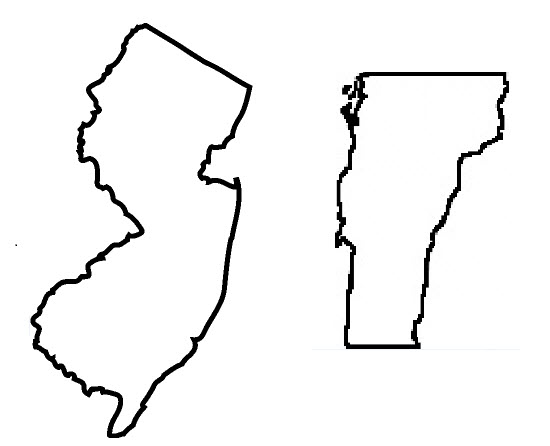
While your paint is drying, decide what design you want your nail art to be. Since state shapes are popular on Pinterest I decided to combine my home state, New Jersey, with Shane’s home state, Vermont. Just Google an image of whatever you choose and print it out in accordance with the size of your wood. Then, cut the shape out of the paper.
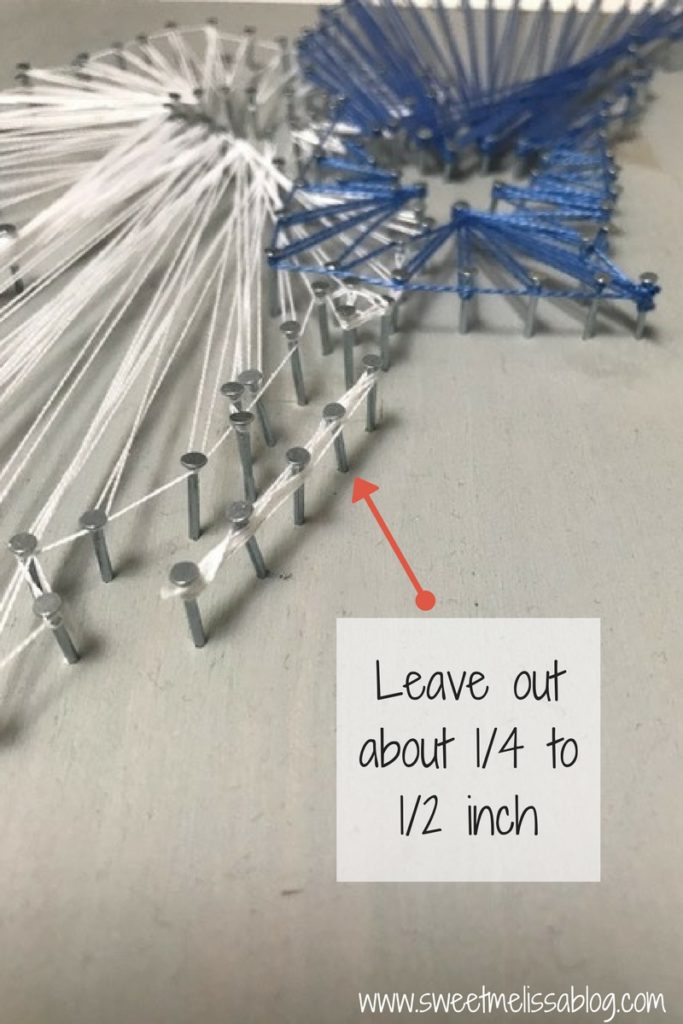
Step 3 – Nails
Lay your shapes (in my case states) onto your dry wood. Hammer in your nails following the border of your shape. Space the nails out about a quarter-to-half-inch each and make sure to hammer them in just enough so they are sturdy. They should be sticking out of the wood for the most part.
Step 4 – String
Remove the paper from the wood. Tie one end of your string in a knot around your starting nail. Then simply alternate stringing around and across the board. You can’t go wrong here – just loop the string around whatever nail you like until the shape of your state takes form. Cut off any loose ends when you’re finished. If you’re doing more than one shape/state use different color string to distinguish between the two. Make sure you string one shape/state at a time.
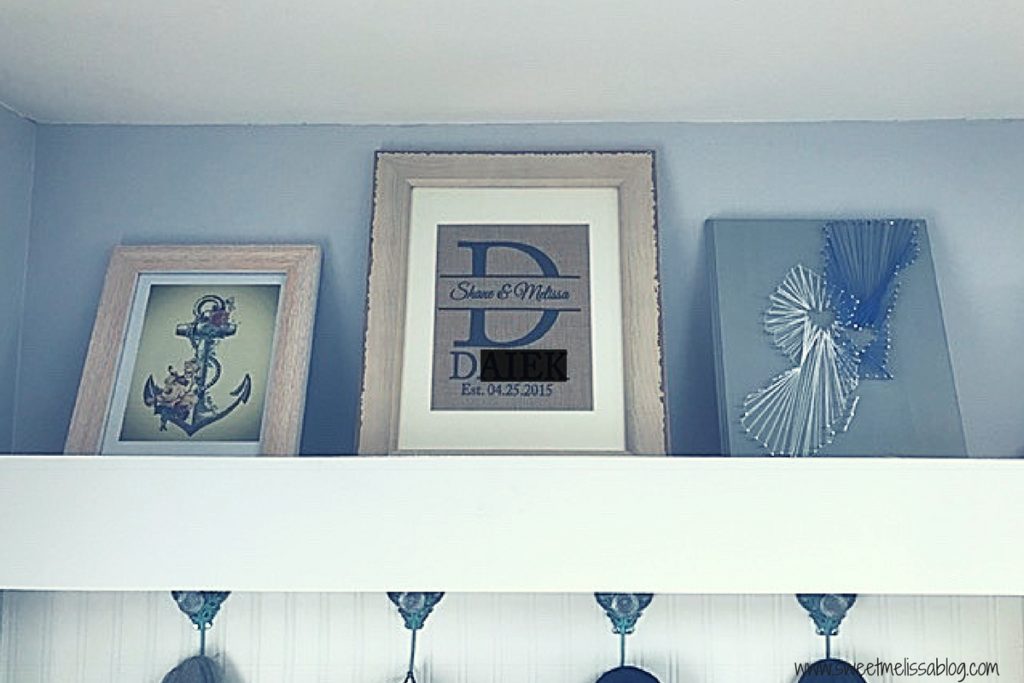
Step 5 – Hang your art
My nail art rests on a shelf but you can hang yours or display it however you want. Wasn’t that easy!?