Wedding seating arrangements doesn’t have to be hard! I mean I can’t do this for you, but there are easier ways to deal with the last minute changes. I am a spreadsheet person so this post will explain how to set up your seating arrangements using an Excel spreadsheet. This is one of the many tabs on my Monster Spreadsheet.
Shane and I were able to set up our friend’s tables pretty easily. We sat them together by “high school friends”, “college friends”, “work friends”, etc. My mom, however, gave me her handwritten list and changed it about 1,000 times. I told her to save herself some time, stop writing new lists, and to just tell me the changes because it took about 2 seconds to update using my spreadsheet.
Our venue gave us a copy of the ballroom floor plan based on how many guests we thought would attend. It showed us where each table would be and how many people each table could seat.

Based off of this, I was able to start my spreadsheet. First, let’s do a quick tutorial of terms:
- Column – a column is the list of vertical cells. In Excel, these are typically labeled by letters (i.e., A, B, C).
- Row – a row is the list of horizontal cells. In Excel, these are typically labeled by numbers (i.e., 1, 2, 3).
- Formula – a formula is an equation that includes columns and rows to produce a certain function.
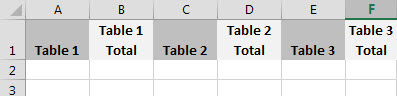
Open a new Excel workbook. Along the top of the first row type in “Table 1”, “Table 1 Total”, “Table 2”, “Table 2 Total”, etc. Highlight the text, make it Bold and add background color as you like. Do this for as many tables as you need. You can continue across the spreadsheet or create a few rows of this. I chose to put my tables on a few rows so I could see them all on one screen at the same time. Just make sure to skip about 10 rows in between to save room for your guest’s names.
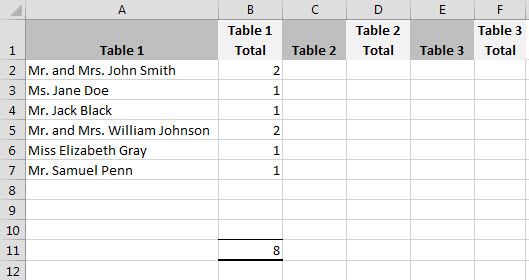
Create a formula to automatically tally the number of people at each table. In the same column as the “table # totals”, skip down about 10 rows and type “=sum(B2:B10)”, then press the Enter/Return key on your keyboard. The letter will vary based on what column you are in and the numbers will vary based on what row you are in. Right now, I am creating the formula for Table 1 Totals, which is column B and rows 2 through 10. For Table 2 Totals, the formula is “=sum(D2:D10)” and so on.

Once your formulas are set up for each “table # total” column, start entering your guest list into the “table #” columns. Enter the number of each guest attending next to their name in the “table # total” column. For example, after you enter a couple’s names, enter “2” into the next column. If you enter a single person’s name, enter 1 into the next column. As you do this, you’ll start to see the number in the formula cell automatically add up your guests.
Continue to do this until your entire guest list is placed at tables. If a person or couple should be moved to another table all you need to do is copy and paste their name and number into the correct table. The formulas do the rest! If someone changes their mind and they can’t make it, delete them from the table and the formula will recalculate. It’s as easy as that!
This is what my final seating arrangement spreadsheet looked like (I blocked the names for privacy but you get the idea).

Here is another option
If you’re not a spreadsheet person and need a more visual approach I like the poster board idea. Create a layout of what your reception will look like using a plastic cup and marker to trace tables.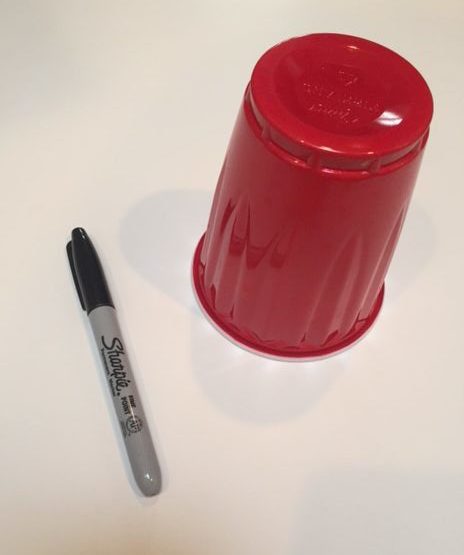
Write the table number in the center of the circle. Write each guest’s name on a sticky note and place him or her at the tables. You can get really crazy and color code your guests (see below). If something changes you can just rearrange the sticky notes to different tables.

Check out my other Wedding Series posts:
- Wedding Series Part 1 – My Special Day
- Wedding Series Part 2 – Wedding Binder Organization
- Wedding Series Part 3 – Computer Organization
- Wedding Series Part 4 – Monster Spreadsheet
- Wedding Series Part 5 – Seating Arrangements (you are here!)
- Wedding Series Part 6 – How to Add a Special Touch to Your Wedding
- Wedding Series Part 7 – Miss to Mrs.
- Wedding Series Part 8 – Our Honeymoon