When we first moved into our house I had a vision for the style and decor of the home. We had a lot of empty space that needed to be filled and of course every living room needs a coffee table. I love to build things and create masterpieces and SAVE MONEY so I decided to make my own coffee table. Another reason I decided to make my own was because it would turn out exactly how I wanted it to.
After browsing around Pinterest for a few ideas I finally knew the look I was going for and how I could make it possible. Friends, my supply list had four items on it. Four! I’d say that is pretty good.
Supplies
- Table(s) (Ikea Lack)
- Wood
- Nails/screws
- Paint
Tools
- Hammer and/or metal chain
- Paintbrush
- Drill
- Screwdriver
You don’t need much skill to build this table. While I enjoy building and crafting I am no handyman or professional. I just follow directions (or cross my fingers and hope for the best!).
Tables
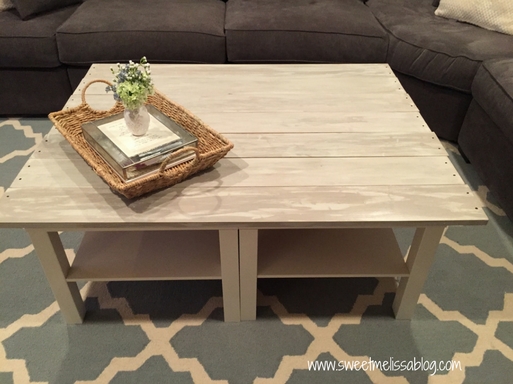
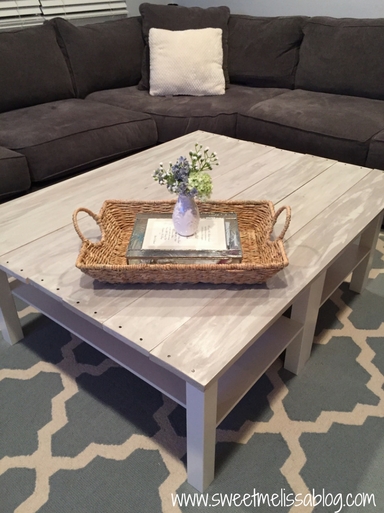
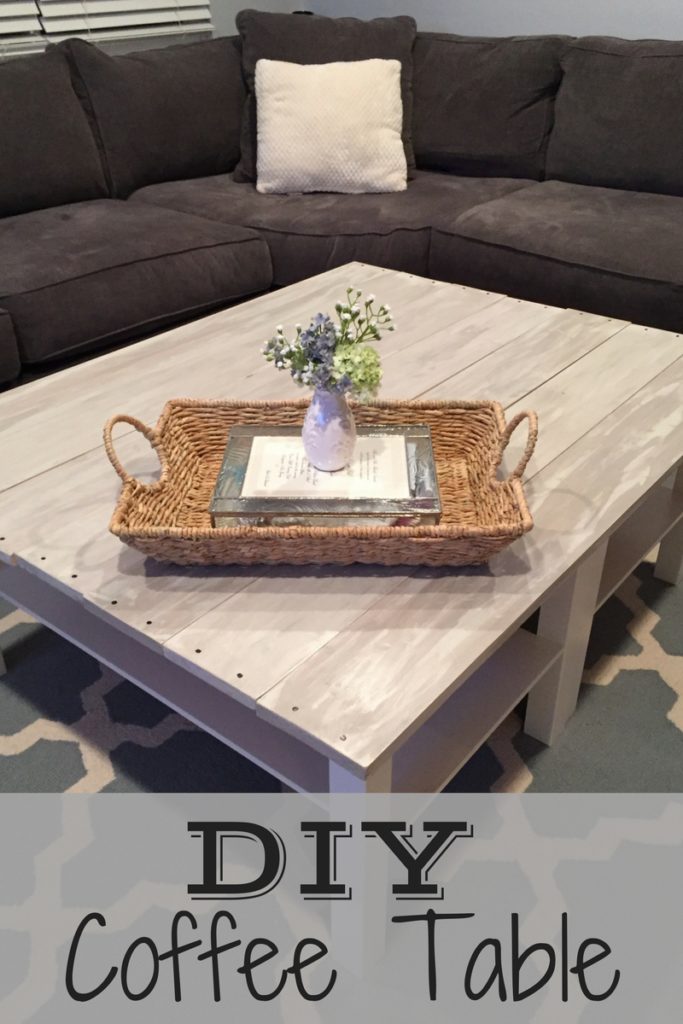
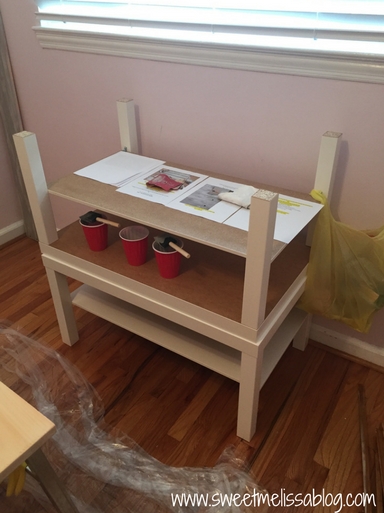
I purchased two Ikea Lack coffee tables in white. You can choose to only use one table (or three, or four…). I decided on two because the size of them put together was a good fit for our couch. I like these tables because they are easy to put together and have a bottom shelf for extra storage. After assembling the tables I set them aside to work on the top of the coffee table. As you can see, these tables also function as a paint stand, an instruction booklet holder and a garbage hook…
Tabletop
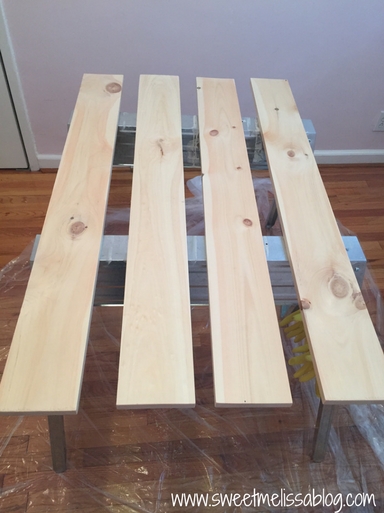
For the tabletop, measure the length and width of however many tables you assembled. My measurements are 35.5″ x 43″. I figured using 6″-wide planks of wood would be enough to cover the width of the table with 1.5″-2″ overhang (When figuring out your measurements, add 1.5″ to 2″ extra to give your coffee table a ledge.). I ended up purchasing four 8′ x 6″ pieces of wood, cut in half to 4′ each (ask the store employee to cut the wood for you).
I sanded down the wood with a sheet of fine grain sand paper so the edges were smooth.
Next, beat the wood – literally. Take your hammer or metal chain and give it a few good whacks. This will give it a weathered look in the end. It also allows you to get some built up anger and aggression out…
Paint
This is the fun part. Choose any color(s) you desire and go to town! I selected three shades of gray from Benjamin Moore and went to the store for their sample size. You do not need to purchase an entire can of paint! Use a foam brush to apply “wisps” of paint, alternating the colors until you have an even mixture. You can’t go wrong here… just paint until it looks “right” to you. Let the paint dry, then apply a poly finish to give it a shine and protect the wood.
I also bought little black nails to give it an extra touch. When the paint was dry I hammered two nails into each end of each plank.

Putting it all together
Once everything is built and dry, lay the wood planks on the floor paint side down. Put the table(s) on top of the wood top side down. You should be able to see that extra 1.5″-2″ of overhang. I used extra floor trim (see the picture above) that we removed in another room to use as a frame for the tables. I’m assuming you don’t have extra floor trim laying around so you can use very thin wood (1″ or less) or purchase trim. Frame the entire table to ensure all the wood is secured together.
Use your drill to make holes through the trim and just a little bit through the wood planks. Then, use your screwdriver to secure the screws/trim/wood together. It doesn’t have to look pretty, no one will see it unless they are under your coffee table…
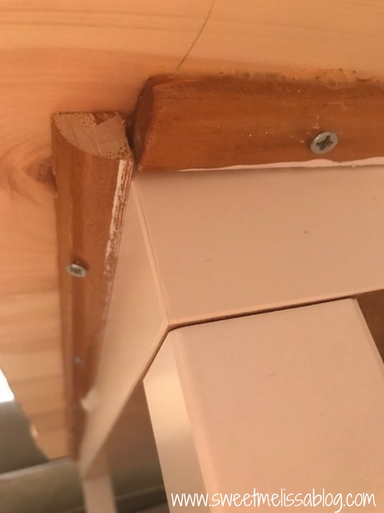
Your frame should be a close, snug fit to the tables so they can’t wiggle around. Adding the frame allows your tabletop to be removable incase something spills through the cracks of the wood or if you decide not to use the wood anymore.
Flip everything over and voila! You have a coffee table with a removable top!