Of all the pieces from our giant furniture haul the mirror has transformed the most. If you’re new to the blog check out Our Giant Furniture Haul. The mirror is something I really wanted to transform and figure out how to use somewhere in our home. I didn’t know how or where exactly, but after some research I finally figured it out.
This post contains affiliate links. For more information please see my disclosures here.
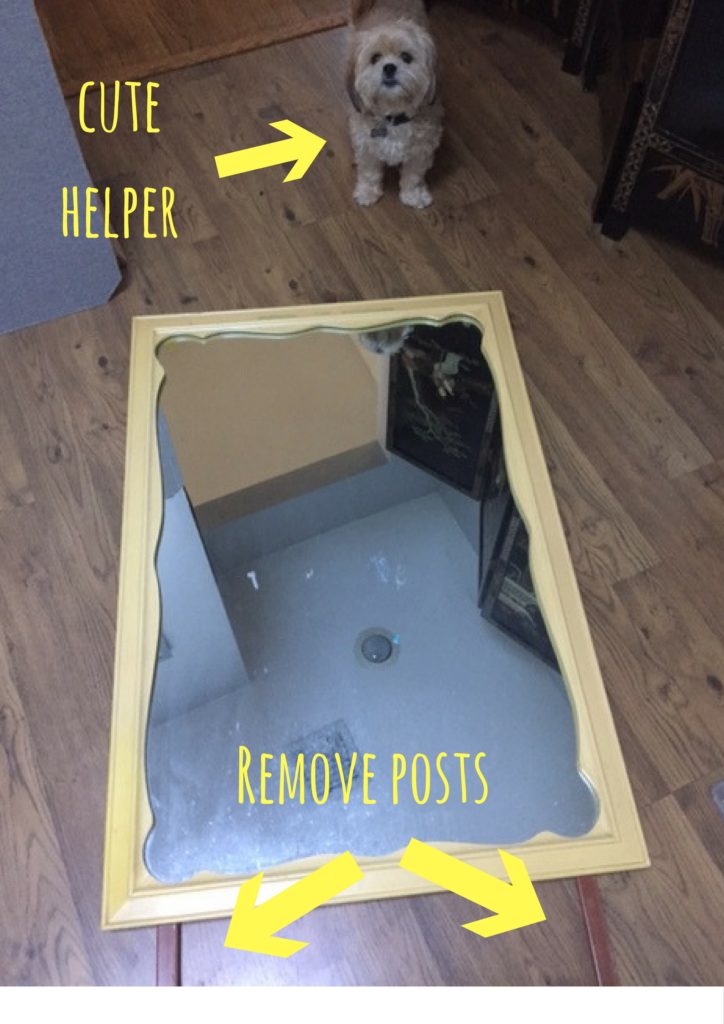
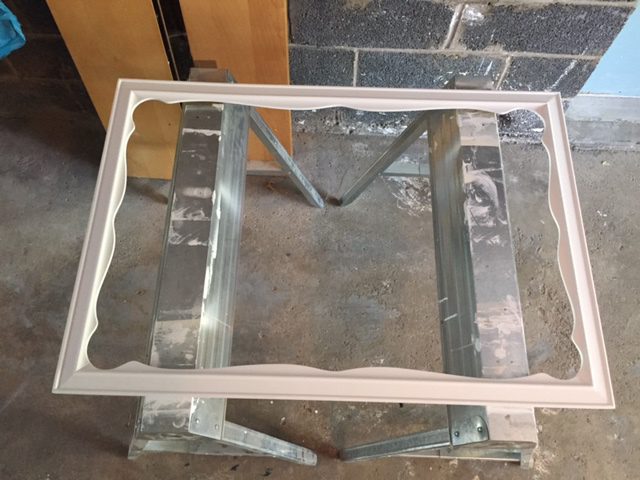
Just look at how terrible the glass looks on the mirror. I wouldn’t even know where to begin cleaning it. Add the deep scratches and forget it. The glass was garbage. This left me with a pretty frame… but what to do with it?
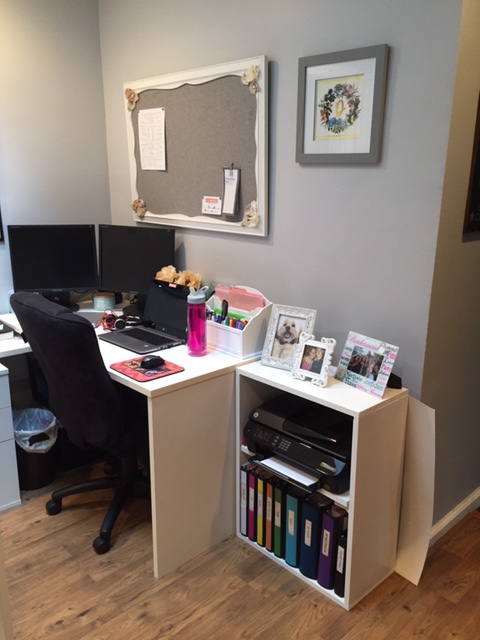
After refinishing the desk and chair I got to thinking our office could use a new look. A big bookshelf sat on top of the desk which made everything seem smaller, not to mention having less room on the desk. There was also an empty space next to the desk where I could store everything on the bookshelf. So away with the big, chunky bookshelf and “hello” blank wall! THAT is where the frame would go.
I finally figured out what the office needed… a cork board! But a pretty one of course 🙂 I grabbed my cute (and unhelpful) helper and started taking the mirror apart. The first step was to remove the two posts that connected the mirror to one of the dressers.
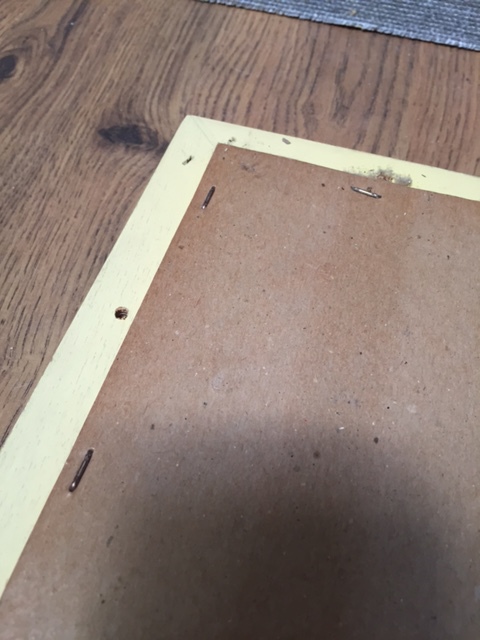
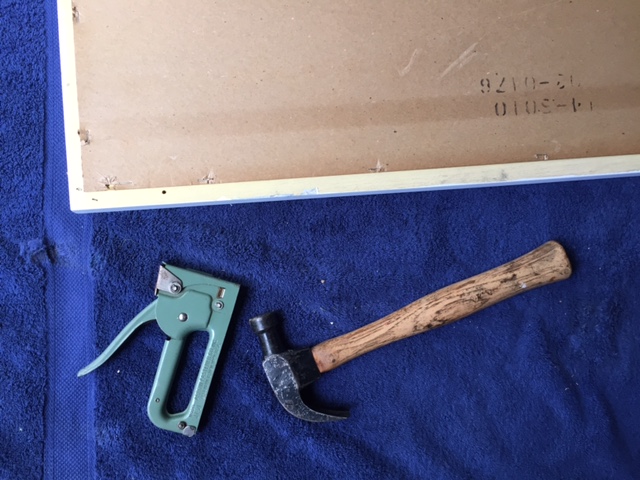
Then, I used a staple remover to take out all the staples on the board covering the back of the mirror. This is what held the glass in place. My fingers have never hurt so much in my life after removing 5,294 staples! Okay, maybe I’m exaggerating a little… okay, a lot!
After I took the glass out I let Rocco check himself out in the mirror for a few minutes before I put it in the trash (the mirror, not Rocco).

Next, I set up shop in the garage and painted two coats of white from the FREE paint selection I received. Of course, I added my protective finish using Minwax Satin Polycrylic Protective Finishes![]() . I made sure the frame was 100% dry, letting it sit overnight before the next steps because I had to flip it back over on the painted side.
. I made sure the frame was 100% dry, letting it sit overnight before the next steps because I had to flip it back over on the painted side.
I had a piece of cork board that was almost the right fit (you’ll see what I mean in a minute). If you don’t already have cork board you can find it on Amazon. Just make sure you have the right amount to fit inside your frame. After placing the cork board in the frame, I stapled the backing to the frame and hammered in each staple so the cork board wouldn’t move. Adding staples is so much easier than removing staples!
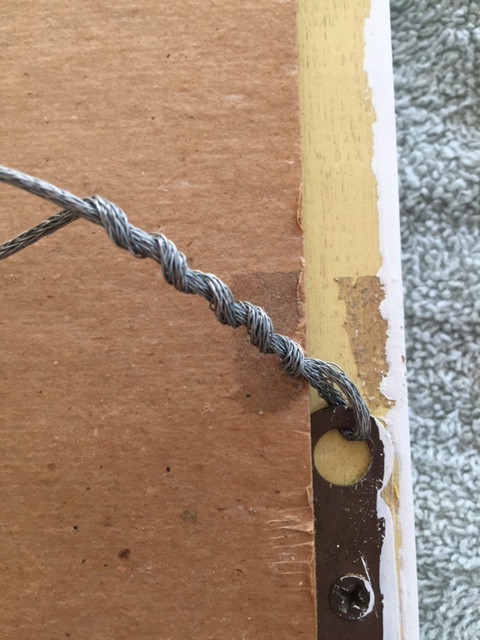
The frame already had two hooks to hang the frame but no wire to hang it from. I used OOK Framers Galvanized Hanging Wire![]() in order to hang the frame from one nail/hook in the wall. Make sure your wire supports the weight of your frame. The wire I used was more than enough support.
in order to hang the frame from one nail/hook in the wall. Make sure your wire supports the weight of your frame. The wire I used was more than enough support.
To add the hanging wire to your frame, loop it through your hook. Then, twist the wire around itself a few times like below.
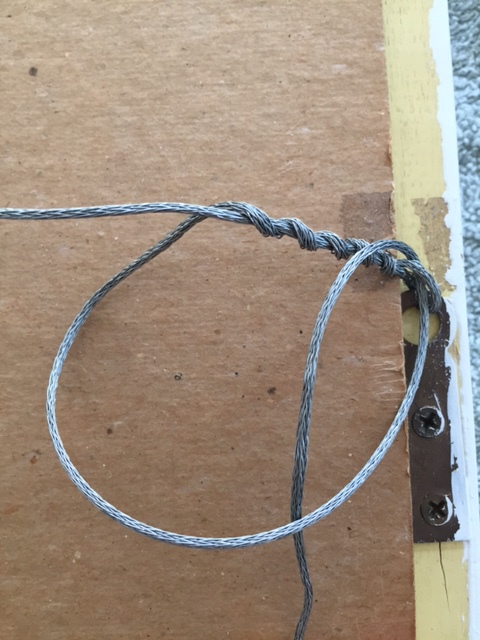
Next, create a loop and insert the end into the loop. Pull tight from the other side. This will secure the wire in place. Stretch the wire to the other side of the frame, leaving juuuust a little bit of slack and secure the wire to the other side following the same steps.
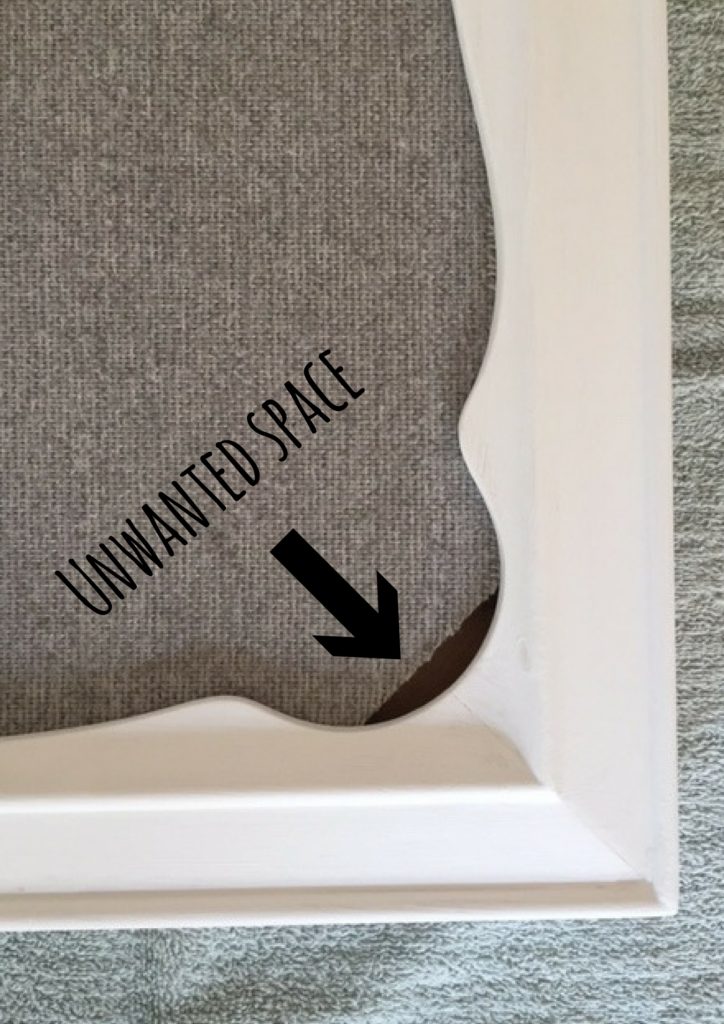
At this point you may be finished, but not me! Remember I said the cork board almost fit the frame? The cork board that I used had the corners cut off and were not 90 degrees so you could see a space between the frame and the cork board in each corner.
Easy fix! I bought an assortment of decorative scrapbooking flowers at my local art store and went to town with my hot glue gun.

I LOVE how this turned out. It is my absolute favorite transformation from our giant furniture haul. Once the glue was dry my cork board was ready to hang. Here is what it looks like in the office (ignore the messy desk).