Hopefully after reading Blogging For Newbies From a Newbie I’ve inspired you to get started on your blog. I provided a step by step process for starting your blog on Bluehost and explained why I decided this was the best choice for me. In this post we will cover the basics of the dashboard, writing a post, creating pages, and adding media.
CLICK HERE TO GET STARTED WITH BLUEHOST.
This post contains affiliate links. For more information please see my disclosures here.
When you first log into WordPress this is what you see (yours may look a little different depending on your settings, plugins, etc.). Along the left side is your menu where you can navigate to your posts, your appearance, etc. We’ll go through the basics:
- Dashboard
- Posts
- Media
- Pages
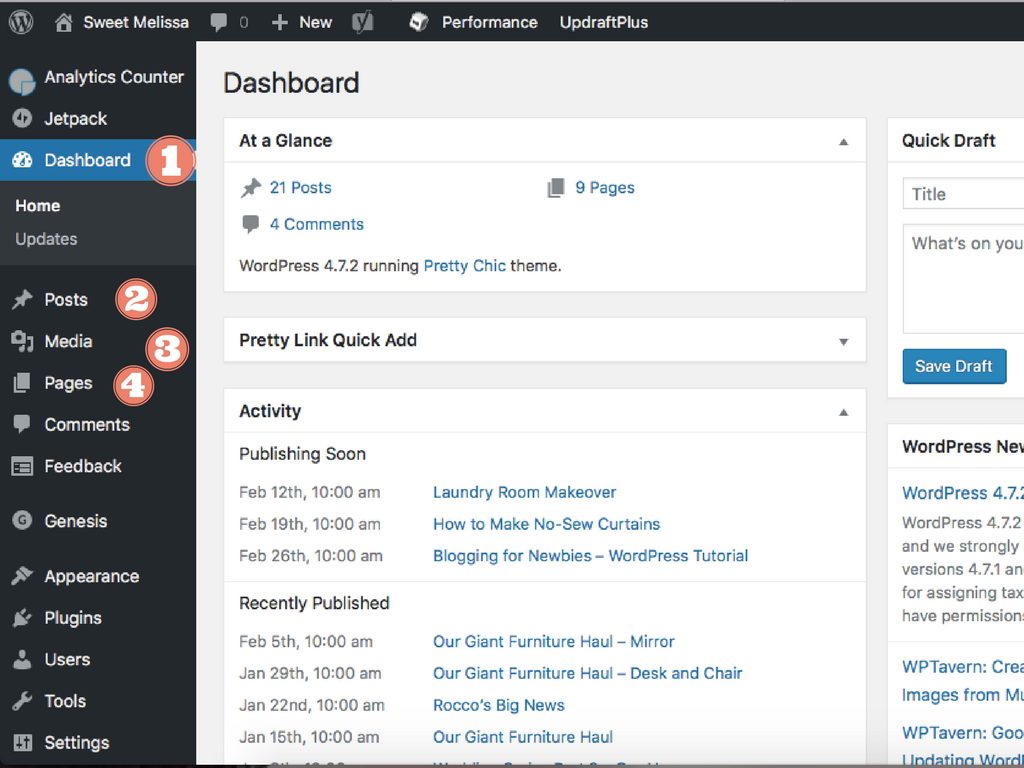
Dashboard
The dashboard is a quick summary of everything going on with your blog. For example, it displays your blog “At a Glance”, Activity, News, etc.
- At a Glance – How many posts you published, how many pages you published, how many comments you have, your current version of WordPress and your theme.
- Activity – Displays details of post that have been published and that are scheduled to publish in the future.
- Quick Draft – Allows you to type notes or create a draft post for you to come back to later. This is a good place to quickly get your ideas down.
- WordPress News – Updates about new releases and updates. Also provides articles relating to WordPress.
- Recent Comments – Displays reader comments and what post they belong to.
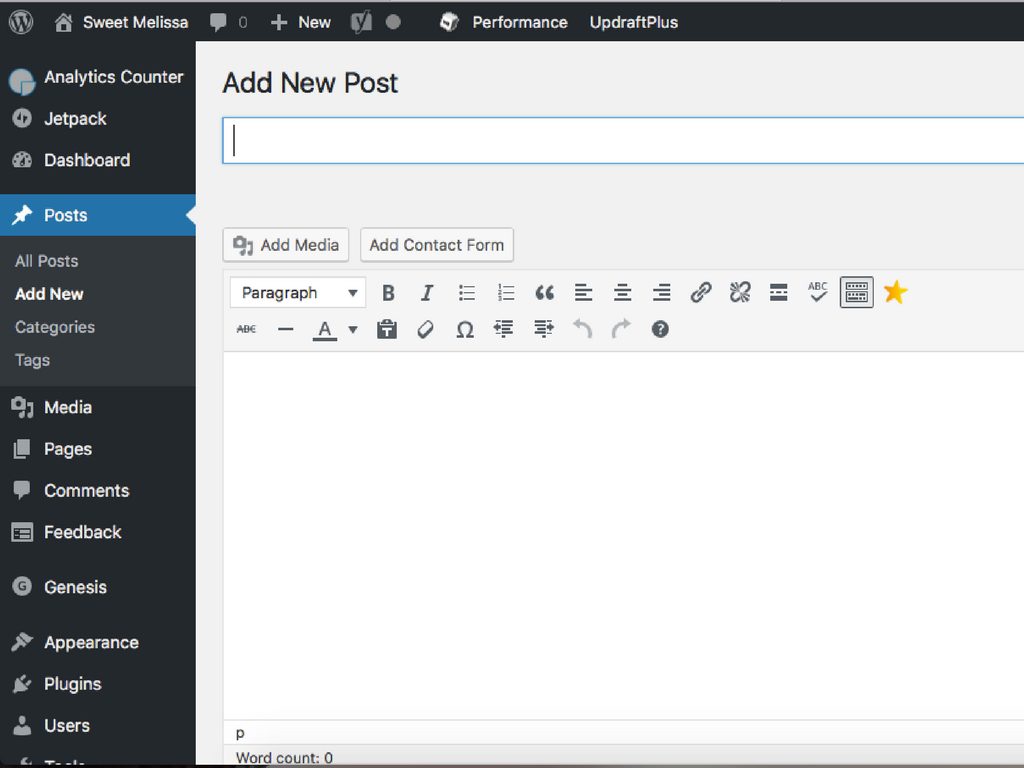
Posts
Posts is a giant list (well, small to start with) of all the posts you published or schedule to publish in the future. Like the dashboard, the posts page gives you a quick glance at information relating to your posts such as title, categories, comments, date published, etc.
To write a new post click the Add New button on top of the page. Once you enter your title, WordPress automatically creates a Permalink. This is the link that takes you and your readers directly to the post. Next, type away! Write your new post and add images by clicking the Add Media button above the text box. You can format your text by adding headers, bullet points, bold, italics and much more. If you hover over the formatting buttons with your mouse a pop up will explain what the button is for.
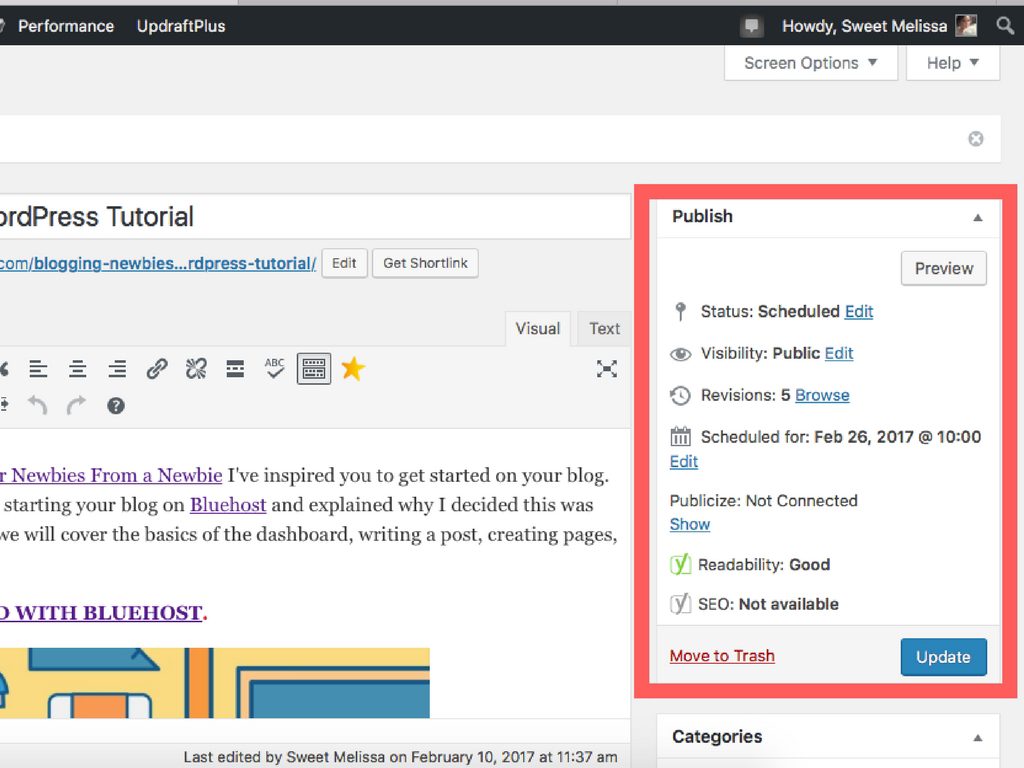
To the right of the text box is the Publish box. This will tell you things like what status your post is in (draft, scheduled, published) and when your post will be published (immediately or scheduled for the future). You can also preview what your post will look like. When you are ready to publish, schedule or update your post just click the button in this box.
Media
This is a big photo album of all the photos you upload into WordPress. You can add photos here by clicking Add New at the top of the page or you can add photos directly from your post by clicking the Add Media button (which is what I typically do). You can edit your photo and give it a title. It doesn’t get any easier than that!
Pages
Pages displays similarly to posts. It shows you the title, comments, and date published. You’ll want to add pages for “About Me”, “Contact”, etc. To add a new page, click Add New at the top of the screen. Follow the same steps as you would for writing a post. Typically pages do not contain as much text as a post.
Back to Basics
A lot of this is intuitive. It may seem overwhelming and confusing at first but once you play around a little a get a few posts under your belt it won’t seem so bad. The key words here are PLAY AROUND! This is your blog – you can’t break it or ruin it because you can always change it and update it. Have fun with this and keep writing. You’ll get the hang of it in no time.